Friday, 27 April 2018

EASY CROCHET COASTERS

Coasters in different shapes and materials can be found in almost every home, on the breakfast table,  the coffee tray or the garden table. They are used to protect the furniture from the heat of your coffee as well as the condensation of your iced drinks. With constant use coasters should be changed or replaced often and for this reason it is good to have a variety to suit different settings and occasions.

And the best way to achieve this is by making your own. But don't just make them for your own home, also consider crafting a set as a gift for someone near and dear to you. Mother's day is close and the set of coasters I show you today would be quite a suitable gift and is quick and easy to make.


Coaster set 
For this set you will need 1 ball of yarn in each colour you wish to use, a crochet hook 3mm and 61 plastic rings about 5mm thick with an inner diameter of 1.5cm, 7 for each small coaster and 19 for the large one.


Plastic rings, slightly enlarged
Each ring is filled with 24 double crochet and closed with a slip stitch into a round.

If these rings are not obtainable you can change the way the coasters are made. In the video which follows you will be shown some smaller circles in different colours for a different look. Those smaller circles are worked around five chain stitches closed to a round. To obtain a similar sized coaster you will crochet 19 small circles. Each circle is made up of a 5 chain round, filled with 12 double crochet.


 As you can see, the starting tail is worked right into the round and therefore can be cut off on completion. Leave a tail when each circle is complete to attach each circle to the next from the wrong side of the work. When work is complete trim off any ends.

I hope you will enjoy this small tutorial and that it will inspire you to make many variations which you can treasure.

If there are any questions, likes or dislikes, please let me know. I will get back to you soonest.


1 large, 6 small

Friday, 20 April 2018

DELICIOUS MANGO PRESERVE

The last post gave you a recipe for a delectable mango jam but today I will show you a lovely variation which I call mango preserve. Searching high and low for the correct name I finally decided to call it a preserve.

There are marmalades and jams, jellies and confitures, fruit butters and cheeses, all prepared by different methods and for different purposes. But what they all have in common are fruit and sugar. I found that fruit butter comes closest to my own recipe but I simply find the name unappealing. And since it is not a commercial product I prefer to call this yummy spread mango preserve!


First jar of mango preserve, just sealed and still hot!

As I said in my last post, it is almost impossible to accurately determine how many mangoes will be needed to make up a given weight when prepped. So much depends on individual size and how juicy they are. If you buy your mangoes by weight get double the weight you need because skins and stones will be discarded. If you purchase the mangoes in the local markets you pay for a little heap of 3 or 5, depending on the seller. To obtain 1kg of prepared fruit you will need at least 15 mangoes, so I suggest to buy a few extra. You can always eat them fresh if they are too many!

Equipment needed is the same as in the previous post and if you are not sure about how to sterilize your jars you can read it there as well.

Before I come to the actual recipe there are a few preparations necessary. Wash the fruit , slice off the flesh as close to the stone as possible, then make vertical and horizontal cuts from the inside right down to but not through the skin. Turn the skin up and you'll get what is called a hedgehog. Now it is easy to cut off the mango cubes. Place on the scales and continue until you have 1kg. Then proceed to chop the fruit very finely so that only little pieces remain.


Finely chopped

Since mangoes are very fibrous it is important to cut them as small as possible.

Add mangoes and sugar to pot

The amount of sugar needed depends on the sweetness or tartness of the fruit. The normal ratio of sugar to fruit is 10% but not higher than 20% if the mangoes are very tart. 

                 
 To make your delicious mango preserve follow the recipe below:


Mango Preserve 
print recipe 
                                                   
           
A very tasty spread using less sugar than in regular jams
Ingredients
  • 1kg, prepped mangoes
  • 100 - 200g sugar depending on tartness 
Instructions
Place prepared fruit and sugar in your stainless steel pot and put on low heat. Stir a few times to distribute the sugar, then cover pot and allow to come to boil slowly. Continuing on low heat and keeping pot covered, boil for 30 minutes. Do NOT be tempted to open pot for stirring! Stirring will spoil the concoction at this stage by crystallizing the sugar. After half an hour you remove the lid and increase heat to allow the fruit to bubble. Now you will stir until the mixture thickens slightly. Test by placing a teaspoonful on a plate and drawing a line through it. If the line flows together continue cooking for another few minutes. But if it stays open take the pot off the heat and and bottle the preserve immediately and seal.
Details
Prep time: Cook time: Total time: Yield: 3 medium jars

Friday, 13 April 2018

THE BEST MANGO JAM

The mango season is finally here and it is time to preserve as much of the fruit as possible, so we can enjoy the taste not only now but during the rest of the year when mangoes are not available. Juices, jellies, preserves and jams can all be made and when prepared and stored correctly will not spoil for at least a year. To start I made a batch of mango jam which my family enjoy.


First batch of homemade mango jam

Maybe you think that jam-making is too difficult but it is not, I promise. The equipment needed can usually be found in any kitchen:
weighing scales
food processor or blender
a fairly large cooking pot, preferably stainless steel
a sharp knife and cutting board
cooking spoon (I prefer the wooden type)
a few saucers (for jam testing)
a funnel
a jug or ladle
a sugar thermometer is a bonus but it is NOT essential
jam jars
dishcloths, potholders or oven mitts
a deep roasting tray or similar for sterilizing the jars
a pair of tongs with a good grip


Jam jars can be bought or collected. I prefer to collect them, thereby saving quite a bit and since I only make jam for family and friends nobody minds what jar the jam comes in. Any jar from purchased items is safe to use as long as both jar and lid are free of any damage. And the lids should all have the pop-button which is very important for my way of bottling the jam.

If you have not made any jam or preserves before you might not be familiar with sterilizing the jars and other items like funnel, jug or ladle. So let me tell you the easiest method I know of. Wash jars and lids in hot soapy water until thoroughly clean. Then rinse in hot water to remove any trace of soap. Line a roasting tray with a clean dishcloth and place jars and lids as shown in the picture.

Ready to be sterilized, except the lid on the left which is damaged.
Heat your oven to 180℃, add water into the pan for about 1 cm and a few drops into each lid but not the jars. Allow 1/2 hour in the oven at the given temperature, then switch off. Keep the jars in the oven until the jam is done. It is best to sterilize the jars while the jam is cooking, so they will still be hot when the jam is ready to be bottled.

To sterilize jug, funnel and ladle wash as you did the jars, then place into a large pot, cover with cold water, bring to boil and continue boiling for three minutes. Cover pot and turn off the heat. This should be done before you start the jam, else you'll find that you don't have enough hands to do everything at the same time!

Now we can proceed to the jam making. Choose firm, slightly underripe mangoes without bruises or other signs of damage.

No damage, the specks are the dried tree juices from plucking the fruit
which will be washed off before processing.
It is impossible to say how many mangoes to buy for a given weight because the size of the stone varies as does the amount of juice. For this session I used 12 fairly large mangoes which yielded 900 g of prepared fruit. The ratio of sugar to fruit should be 2/3 i.e. 600 g. Water should be 900 ml. Process to a puree in  your food processor. If not available use a blender with  the addition of some of the measured water. Then place in your pot and proceed with the recipe below.
Fruit pulp with sugar added

Fruit pulp


Fresh lemon juice

Citric acid


RECIPE


Mango Jam


Tip


One does not have to purchase new jars for jam making. I firmly believe in recycling, so I collect
jars from commercial preserves as long as jars and lids are free from any damage. The lids should
all have a pop-up button and a kind of rubbery coating on the inside to ensure a firm seal.

Ingredients

1 kg fresh mangoes, chopped
700 g sugar
1 l water
2 Tbsp citric acid
Juice of one lemon

How To

Place all ingredients in a large stainless steel pot and bring to boil on high heat.
When boiling reduce heat to medium for about 20 minutes.
In the meantime place your chosen jam jars in the oven to sterilize.
After 20 minutes remove any scum which has formed on top of the jam. Increase heat to bring jam
to a rolling boil. If you have a sugar thermometer it should read 120℃. If no thermometer is
available, place a little jam on a cold plate and allow to cool.
Pushing it with your finger should make it wrinkly. That shows the jam is ready and needs to be
taken off the heat.
Remove jars from the oven , then fill with jam using a sterilized funnel and jug. Make sure the rims
of the jars are clean, then put on the lids tightly. When cool the jars should be sealed with the pop-
buttons down.
This way the jam can be stored in a cool, dark place for at least one year.


Friday, 6 April 2018

CYCA REVOLUTA - SAGO PALM


Cycas or sago palms are beautiful plants dating back to the age of dinosaurs. They resemble ferns when young and look almost like palm trees when more mature.

Cyca revoluta with a double trunk

But they are neither. They belong to the group of gymnosperms among which are the conifers, the cycads themselves, gingko trees and a few others. Native to Japan they found their way all over the world, especially where it is warm. Sago is produced from them which gives them the common name of sago palm.

On my walks in the neighbourhood I encounter quite a few of these lovely plants, obviously beloved by many gardeners.What caught my attention recently was the sudden appearance of a large cone in the centre of one plant, which happens only when the plant is mature and many years old. It also shows that this is a male plant, the cone containing the pollen. Female plants produce a feathery looking centre containing the ovaries. Unfortunately there is none among all the cycas in the area or they are too young to produce. Being gymnosperms none produce flowers but a glorious display  of a new crown of leaves in February/March. 

The pollen bearing cone of a male cyca
revoluta

The pollen bearing cones can grow from between 60 - 90 cm in height and can weigh up to 25 kg. the female plant produces egg-like seeds which should be harvested before they fall to the ground to prevent animals from eating them because they are poisonous. Of course the seeds can be used to propagate the plant, but that can take many months. An easier way would be to separate new plants developing on the trunk of the parent plant. 

Now I want to show you a short series of pictures taken in the second half of March when a few of the sago palms started producing their new crowns of leaves. Note the initial resemblance to ferns!


Day 2
Day 1


Day 4
Day 5


Day 7
So, within one week you see the enormous development of the leaves together with the gradual change in colour!

A few days later the crown opened out to complete the next revolution!


Fully formed leaves in gorgeous green


Friday, 30 March 2018

EASTER BREAD NESTS

Bread is a staple in practically every country on earth and over time recipes have evolved to make this everyday food more special for various festivals, seasons and holidays. And Easter breads are no exception. There are so many variations to choose from that it is not easy to decide which bread to bake. But for me it will probably always be the Easter bread nest!

Easter Bread Nests
Each nest contains a coloured egg and is large enough for one person's breakfast. It is not a typical plain bread but enriched with eggs, milk and butter and a mix of dried fruit. Fresh from the oven it will make your mouth water. Best eaten with a little butter and the accompanying egg. You could have a dollop of honey or orange marmalade with it. Whatever your choice, this Easter bread is delicious!

You can bake the bread the day before you wish to serve it and just warm it briefly in a moderate oven or the dough can be prepared the evening before including the shaping and in the morning you only have to brush with melted butter and bake! Now let's go to the recipe.

Ingredients:

500 g flour
1 tsp salt
50 g sugar
100 g butter
120 ml milk
1 1/2 Tbsp dried (active) yeast
3 eggs, lightly beaten
100 g dried tropical fruit (if not available, raisins or sultanas can be substituted but not mixed fruit)
50 g butter, melted

You will need one large or two small baking sheets, greased and dusted with flour. To prepare the dough you'll want a large bowl for the dry ingredients, a jug for the milk, a small bowl for the beaten eggs and a small saucepan to melt the butter.

Method:

Sift flour and salt into bowl. Melt the 100 g butter in a saucepan over a gentle heat. When melted take butter off the heat and allow to cool a little. Then add it to the milk, add the sugar and yeast and mix thoroughly. Make a well in the flour, pour in the milk mixture and sprinkle the top thickly with the surrounding flour. Cover the bowl and let it sit in a warm place for about half an hour to develop the yeast. When the flour on top starts breaking up we go on to the next step.

The flour developing cracks
With your hands or a wooden spoon mix the flour layer with the liquid underneath, drawing in a little extra flour from the sides as well as adding the eggs gradually. When the eggs are well incorporated work in the remaining flour together with the dried tropical fruit (which contains mango, pawpaw, coconut, pineapple and melon). Knead gently to form a soft and smooth dough. Cover and allow to rise for about 1 1/2 hours or until doubled in size. Then knock down the dough and divide it into 4 equal pieces, each of which you cut in half again. Take one piece and roll it by hand into a long rope  on a lightly floured work top to a length of 30 to 40 cm. Roll a second piece to match. Now pinch two ends together and twist the two ropes around each other , form into a circle and pinch ends together to close. Place on prepared baking sheet. Repeat with the remaining dough. Place one coloured egg into the centre of each nest, cover and allow to rise again until doubled in size, about 1 hour. Preheat oven to 190℃ / 375℉. When your Easter nests have risen melt the remaining 50 g of butter and brush all over, except the eggs. Bake for 25 - 30 minutes in centre of oven until golden brown. Cool on wire rack.

If you are doing this in the evening for next morning's baking, keep the shaped bread nests covered on smaller baking trays in the fridge. In the morning allow the bread to return to room temperature, then brush with the melted butter and bake as above.

You can use the eggs plain or dyed. If plain place them in the nests uncooked. But if you want them coloured you can follow this method: Boil enough water to cover 4 eggs, drop in the eggs and boil for only 2 minutes. Remove from the boiling water with a spoon and drop each egg into a glass prepared with the dye. For this I half filled 4 glasses with water and 1 Tbsp vinegar and added 1/2 a tsp of liquid food colouring to each. Yellow, cochineal, sky blue and equal amounts of yellow and blue to give me green.

Clockwise from top left: yellow, blue, red (cochineal), green

Allow eggs to stay for 20 - 30 minutes to reach the depth of colour you want. Rinse, dry and add to the nests. Boiling them for only 2 minutes will prevent them from becoming too hard while baking!


My finished Easter Bread Nests!


If you enjoyed this recipe, please drop me a comment!

Saturday, 24 March 2018

EASTER EGG VASES

When I was little I was always looking forward to Easter because of the various decorations we children could make to herald the spring. There is one in particular I have never forgotten and that is a little vase made from an eggshell.


Wildflowers in an Easter egg vase
To make each vase you first have to eat a softboiled egg. Gently crack the pointy top of the egg and carefully remove the bits of shell until the opening is large enough for your spoon. When eating the egg make sure you do not damage the inner membrane, because this will make the vase waterproof. I tried using a raw eggshell but the membrane became brittle and broke. And for obvious reasons a hardboiled egg will not work either.


This is a nice project for young or old. Children can use paints or stickers to decorate to their hearts' content. Grown-ups too can use various options to create little masterpieces! I decided for a quick and easy way to get an elegant look, so I used spray paint!


Materials needed are clean eggshells, paints, stickers etc. for decorating, glue and something the egg can stand on. As children we used 3 elbow macaroni, glued them evenly around the bottom of the egg, making sure it will stand straight. To make the macaroni waterproof we painted them with clear nail varnish (usually sneaked from mother's bedroom!)

But nowadays it is probably easier (but less fun) to use a plastic ring from a small bottle. Here is what I used:


Cleaned eggshell and plastic ring

Plastic ring glued on. The white line was the result
 of jiggling the ring into its proper position

Spray-painted with gold lacquer
 When all is dry add water and small flowers of your choice. These little vases make beautiful decorations for an Easter breakfast table or grouped together on a centre table. Let your imagination fly!


Silver spray paint was used for this vase

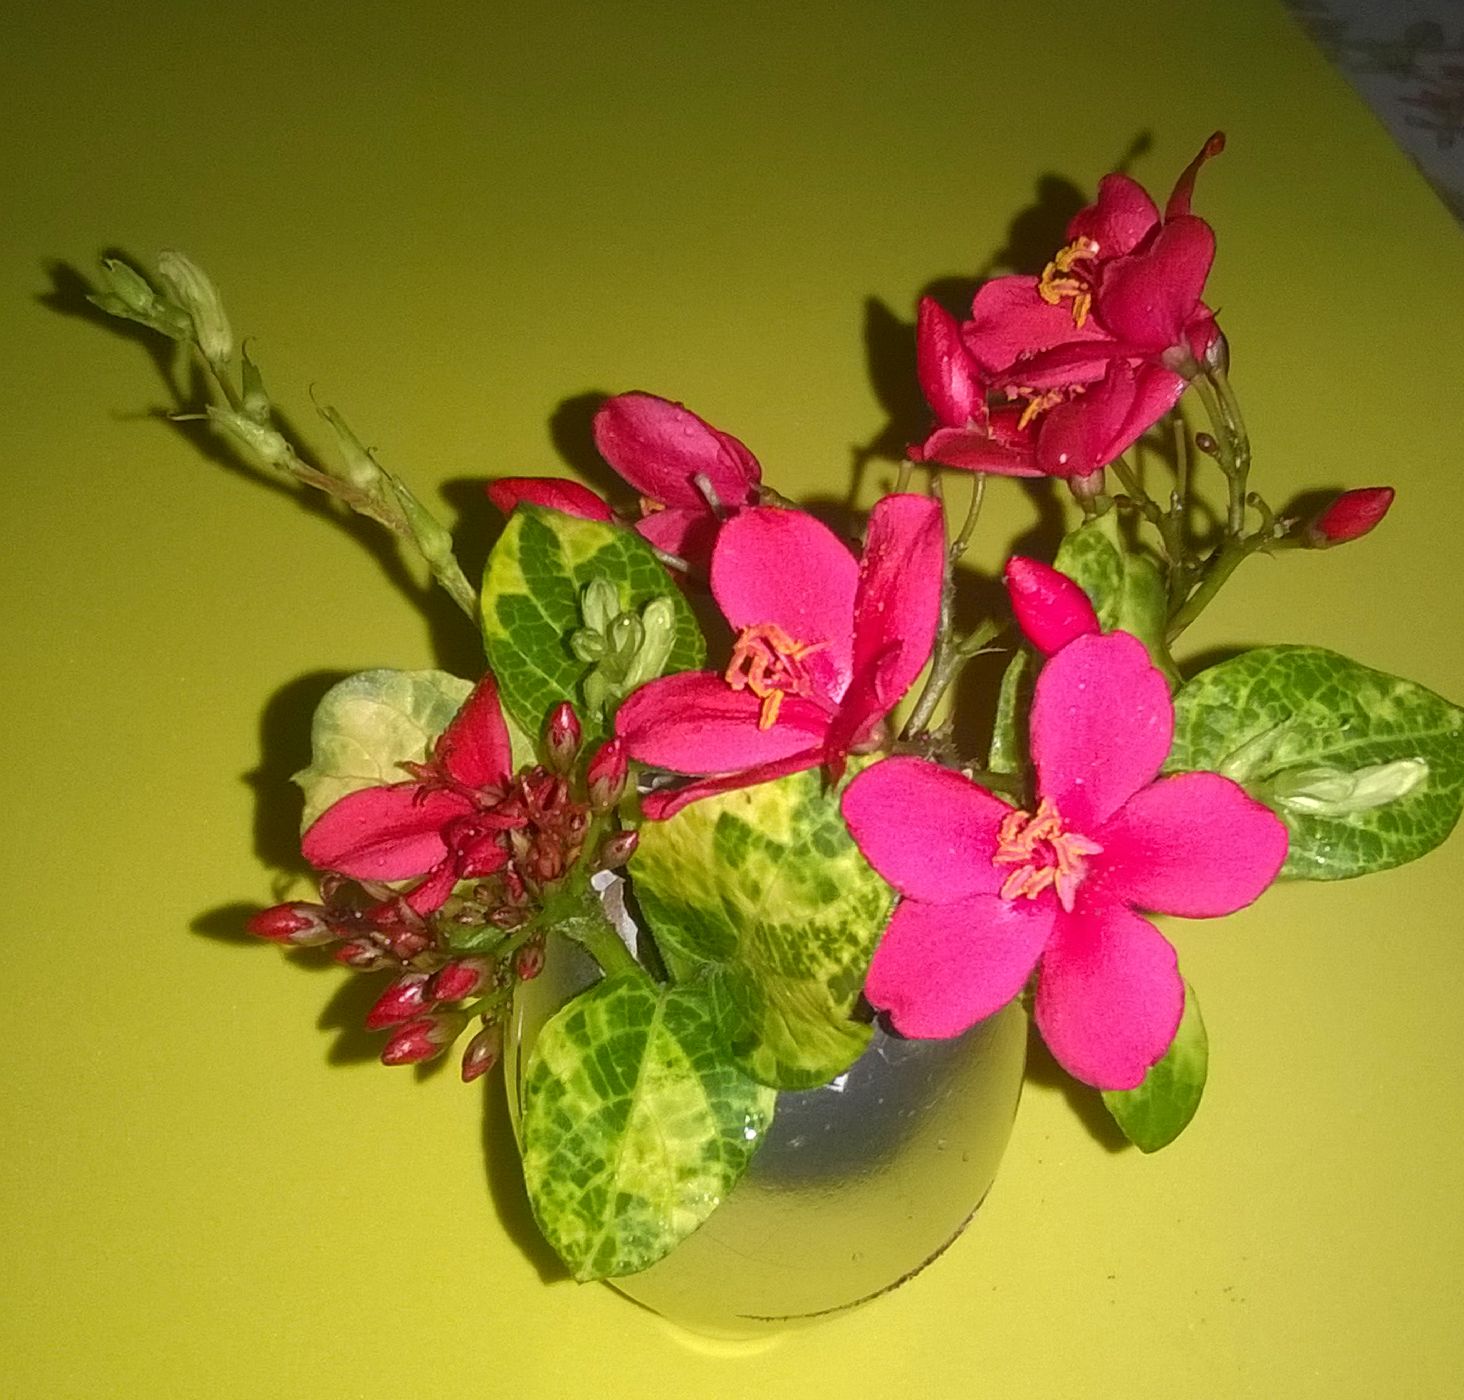
Not many wildflowers available here, so I used small heads of ixora instead


If you live in a temperate climate you could try violets or snowdrops for stunning results!

I hope you enjoyed this post and if you did, please drop a comment!


Sunday, 18 March 2018

JEWELLED EASTER EGGS

Easter is fast approaching and the time to create some decorations for the festivities has come. Today I want to show you something a little different from the usual. Easter eggs made of wire and embellished with beads, crystals and more wire. So, grab your tools, wire and a good selection of various beads in any colours you fancy!


JEWELLED EASTER EGGS
What you will need:

Wire cutters, roundnose pliers, flatnose pliers, chainnose pliers, 20g or 18g copper wire for the egg shapes, 24g and 30g copper wire for attaching beads etc. A selection of beads, crystals, leaf shapes or flower beads, even buttons if you like. For shaping the eggs I used an oval bottle (because real eggs will crack and who has egg shaped items) and a round one with the same diameter as the oval at its widest point (not longest). A measuring tape or a piece of string to determine the circumference of the oval shape. A felt pen or sharpie to mark the oval container where you want to start shaping.

Let us start!

First cut a few lengths of 20g or 18g wire in the length you measured plus an extra 8 -10cm for creating a loop at the top of the egg. Hold the centre of the wire against the narrow part of the oval where marked and with the other hand lead the wire to the opposite side and bend it so it overlaps. Still holding it in place mark the centre of the overlapping wire with the pen. Now you can let go. Form the remaining wires likewise. Next take the flatnose pliers and bend one end up where marked at an angle of 90° and the other end around the one you just bent up, also at 90° where marked.

wire ends overlapping
at right angles
left wire end wrapped
twice around the upright
wire
Holding the top of the oval shape with flatnose pliers wrap the lower end twice around the upright end. Cut the end close to the wrap and use chainnose pliers to squeeze tight. Cut the upright end to about1.5cm, bend it sideways and form a loop using roundnose pliers.

Loop formed and egg shape
formed
Remember the round bottle/container you haven't used yet? Insert it in the centre of the oval and gradually force it down until it reaches the bottom. Use your fingers to re-mould it while the round shape is still within. Gently remove and your egg should be properly shaped. Form the remaining cut wires the same way.

Now it's time to decorate. You can take inspiration from the picture above or you have a session with your creative muse! 

I call my designs jewelled Easter eggs because of the materials used. But you can achieve a completely different style by using pipe cleaners and buttons or other decorative items like in the photo below!

Pipe cleaner wrapped around the egg shape
with motif from a hair clip 

The individual decorated eggs, a little larger this time.


Latest Post

THE TASTIEST PINEAPPLE-GINGER JAM

There are many different types of commercial pineapple jams to be had, some good, some bad and others terrible. Most contain preservatives a...