Showing posts with label baking. Show all posts

Saturday, 2 June 2018

Mango Cheese Cakes

Do you know anyone who doesn't like cheesecake? I don't! And there are so many variations that often it is very difficult to decide which one to make. There are those with crusts or without, baked or unbaked, with dried fruit or without, and others again with fresh fruit on top.

Little Mango Cheesecakes fresh from the oven

The recipe used was handed down to me by my grandmother and I have been baking it, as is, for many years, without variations because it is that good! But since there are so many different types nowadays I decided to create my own version. Now we are at the height of the mango season, so my idea was to make a fresh mango puree and incorporate it to the traditional mix.

To get the best cheesecake ever I recommend that you make your own cottage cheese first because it is preferable to shop bought cream cheese. My recipe for making your own can be found in my previous post. Also make your own mango puree because the canned variety is a poor substitute. Fresh is best; no preservatives, additives or other chemicals we don't want in our food! How to make your own puree is described in the post before. I tried to link but for some reason it did not work, so, please, bear with me!

All the baked cheesecakes I have tasted were made with flour like most other cakes and had a crust at the bottom. But my grandmother's recipe has no crust and no flour but wonderful texture throughout which is decidedly a plus! To achieve this texture the recipe calls for semolina instead, the finer the semolina the smoother the texture. I like to go the middle way so I have a cake with a little chew!

And now for the recipe:


Mango Cheesecakes


Recipe by Anne Lawal
This mixture makes 12 - 16 little cakes, depending on size of muffin tin and liners. The time variation depends on the moisture content of the cottage cheese. These cakes are lovely when fresh but improve enormously (in my opinion) if kept in the fridge overnight and eaten cold. Maybe with a dollop of whipped cream!

Prep time: 20 minutes
Cook time: 30 - 45 minutes
Total time: 50 minutes - 1 hour+
Yield: 12 - 16 little cakes


Ingredients:

  • 125 g butter
  • 200 g sugar
  • 300 g cottage cheese
  • 200 g mango puree
  • 3 eggs, separated
  • juice & zest of half lemon
  • 100 g semolina
  • 1 tsp baking powder

Cooking directions:

  1. Mix butter and sugar until fluffy, then add juice and zest of the lemon and the egg yolks. Pass the cottage cheese through a sieve in order to remove any lumps. Add to the mixture together with the mango puree and stir to incorporate. Add the semolina and the baking powder, stir to combine. Whisk the egg whites until stiff and place on top of the batter. Fold in the whites gently with a metal spoon until worked in, but do not stir. Using a spoon or ice cream scoop portion the mix into prepared muffin tins. Bake in a preheated oven on the middle shelf for 30 - 45 minutes until golden brown and an inserted toothpick comes out clean. When done cool on a wire rack.

Ready for the oven
Freshly baked


Thursday, 10 May 2018

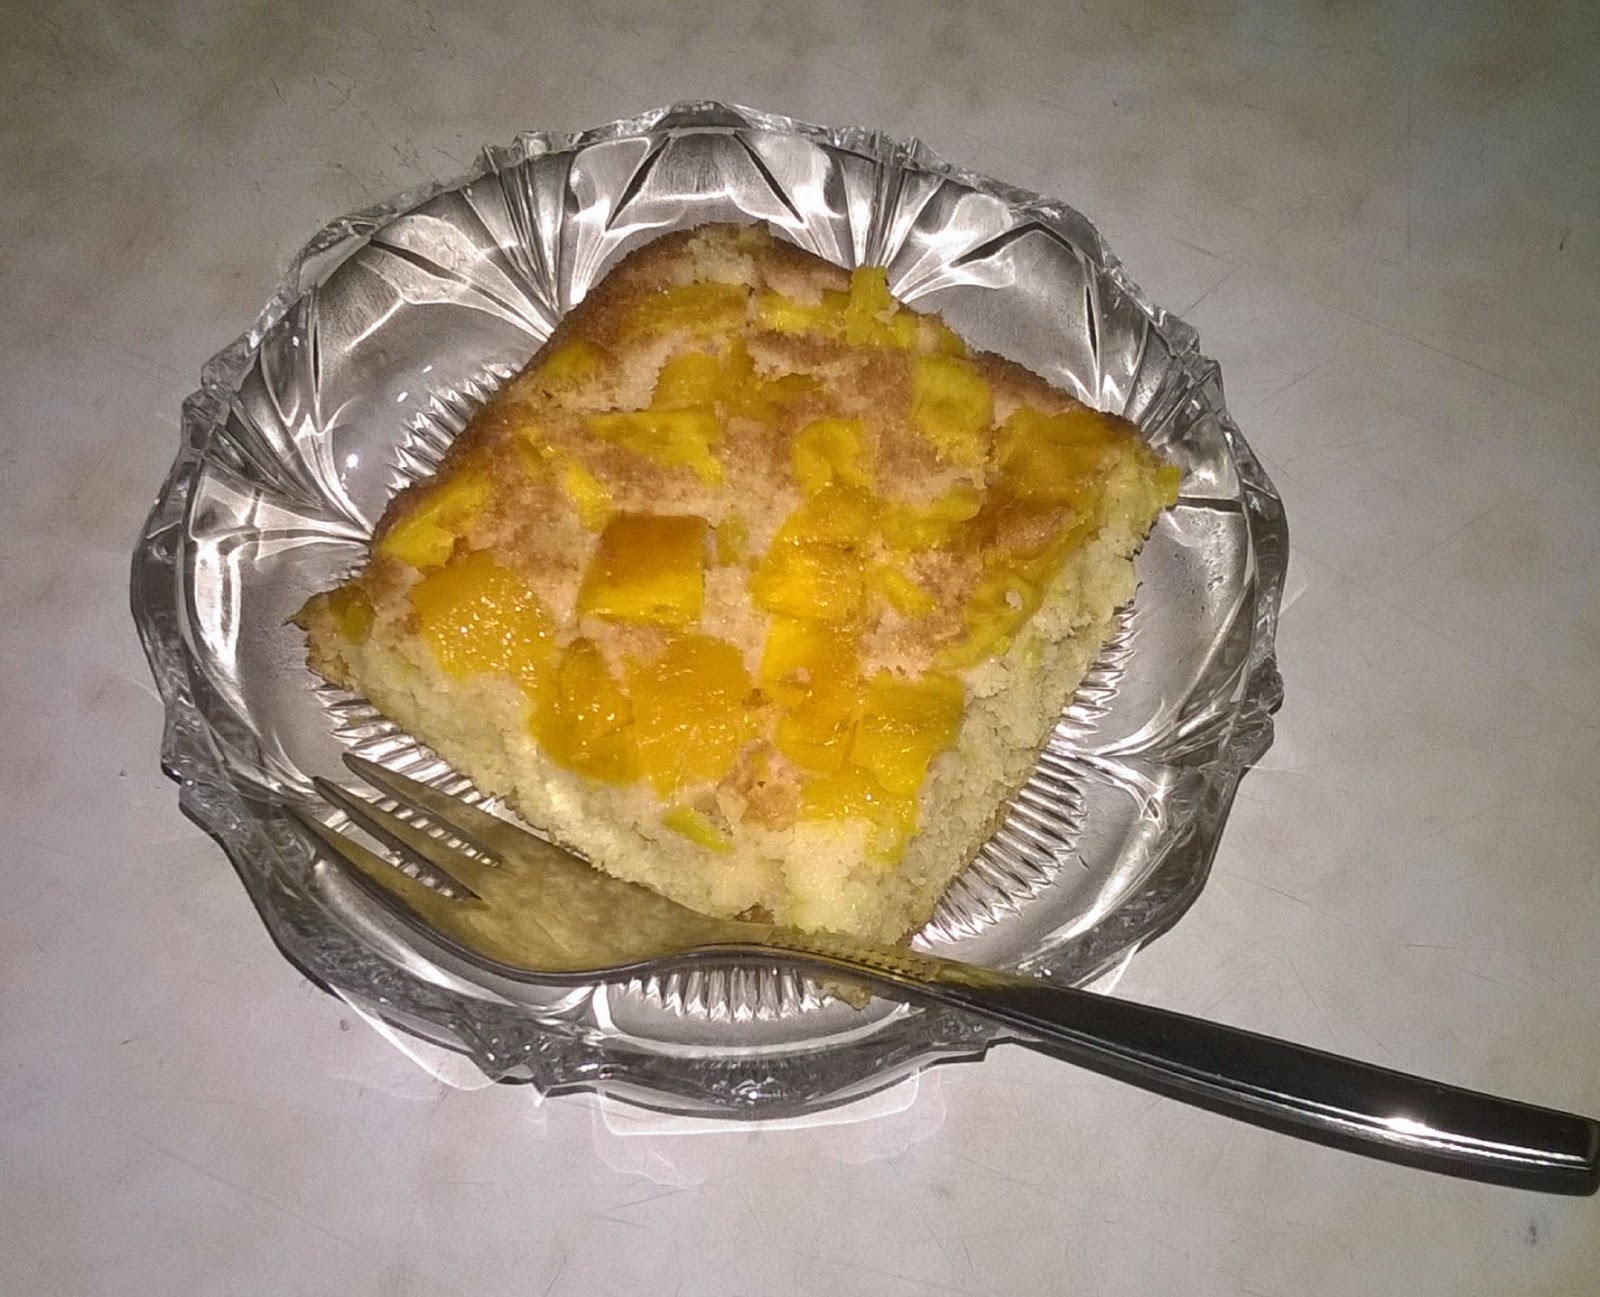
EASY MANGO CLAFOUTIS

Clafoutis is a simple baked dish traditionally made with cherries and is of French origin. Similar dishes can be found in various European cuisines using a different fruit in season. To give it a truly African flavour I experimented and came up with my own version using mangoes.


Mango clafoutis - an easy and light dessert
Since we are approaching the height of the mango season you can find a wide variety of different types in every market. For this recipe I recommend the larger varieties because they have a more intense flavour and are less fibrous. 

Wash and peel the mangoes and cut them into cubes as evenly as possible or, if you prefer, slices and arrange in a buttered baking tray, approximately 28 x 18 cm.


Mango cubes in the buttered pan

Next you will prepare the batter which must not be too thick or too thin. You must be able to pour it rather than spoon it.


Batter poured over the fruit - ready for the oven

So you can see that it does not require a great effort to have a delicious dessert ready in a fairly short time.

Fresh from the oven

And now to the recipe:

Mango Clafoutis

Ingredients

500 g fresh mango, cubed or sliced
2 eggs
125 g sugar
zest of 1/2 lemon
125 g flour
2 tsp baking powder
a pinch of salt
4 Tbsp milk, or less

Method

Whisk eggs together with the sugar and lemon zest. Sift flour together with baking powder and salt and add about half to the egg mixture. Then add 1 - 2 Tbsp of the milk, whisking until smooth. Whisk in the remaining flour and check for consistency. If too thick add another Tbsp of milk. The batter should flow from the whisk in a thick ribbon. If still too thick add the remaining spoonful of milk. I can't be more precise with the amount of milk because that depends on the flour. Some types need more than others, so you need to adjust.

Now pour the batter evenly over all the fruit and bake in a preheated oven at 180℃ for 1/2 hour. A skewer or toothpick inserted should come out clean. Keep in the pan and allow to cool slightly before cutting and serving. Warm or cold is equally delicious, especially if served with a dollop of whipped cream!

This quantity gives 6 -8 servings. But the amounts can easily be doubled.


Saturday, 3 February 2018

Mardi Gras - Shrove Tuesday - Fasching

Just a short while ago was New Year and now we are already in February! This is the time that many countries in the world prepare feverishly  to get the last costumes and floats ready and everything else which makes a carnival successful.

Naturally, food also plays an important part in the festivities! My favourite is the traditional German doughnut, called Berliner everywhere except Berlin, where it is called Pfannkuchen! To add to the confusion, literally translated Pfannkuchen means pancake, which the British use with great enthusiasm to celebrate Shrove Tuesday. But I mean a fluffy, round doughnut filled with Pflaumenmus, known as plum butter in English. If not available, a tasty jam of your choice will be just as good.

Doughnuts - Berliner - Pfannkuchen

Doughnuts are not difficult to make but the dough requires sufficient time to rise. There are two ways to prepare doughnuts - baking in the oven or deep frying. The recipe is the same for both. I will show the deep fried version. Now for the how to:

You will need a deep fryer or fairly large pot. I prefer to use a wok because of the shape. It requires less oil and has a larger surface for frying. You will want a couple of tablespoons to place the doughnuts in the hot oil and a spider or similar to remove and drain them after frying. A lot of kitchen paper or crumpled newspaper is needed to absorb as much oil as possible. A cake syringe is needed for filling the doughnuts.


Dough after the second rising
Ingredients:

500g flour, 2 eggs, 50g butter, 3 tsp sugar, 1 tsp salt, 2 1/2 tsp dried yeast, lukewarm milk, vegetable oil for deep frying, jam for filling and sugar for coating.

Method:

 Mix yeast with sugar and a little of the milk in a small bowl. Cover and allow to become foamy, 5 to 10 minutes. Break eggs into a measuring jar and top with milk to give you 1/4 l (250ml) and whisk. Add the softened butter to the egg milk and stir to help it dissolve. Sift flour and salt into a large bowl, make a well in the centre and add the frothy yeast and the egg/butter/milk. Knead thoroughly. Cover bowl with a dishcloth or clingfilm and allow to rise for 15 - 20 minutes, depending on your temperature. Place dough on a lightly floured work surface and knead again, then put dough back into bowl, cover and let rise again for another 15 - 20 minutes. Now divide dough into 12 to 15 equal pieces, 75 or 60 grams each, as you prefer. If no scales are available you can gauge the size halfway between a golf ball and a tennis ball. Place the balls on a lightly floured tray and cover as before. This time allow to rise for about 45 minutes. If you use a deep fryer get the oil to 180℃, if using a pot or wok the temperature is correct if a wooden spoon held into the oil produces lively bubbles.


Almost ready for frying (or baking)


When the dough is ready and the oil is hot enough, start frying the doughnuts. 2 - 3 minutes each side is all that is needed.


You can see why I like to use my wok!

Lift out the done doughnuts and place on absorbent paper to remove excess oil. Fill syringe with the preferred jam (you can also use Nutella or similar) and a bowl with granulated sugar. Roll each doughnut in the bowl with sugar and before lifting it out of the bowl inject about a generous teaspoonful of jam at the side of the doughnut where the pale line shows.


The filling with jam  can be a bit messy!
Instead of rolling the doughnuts in sugar, they can be filled and then dusted with sifting icing sugar over while they are still hot. Another way is to mix sifted icing sugar with a little warm water and a dash of fresh lemon juice to make a thin glaze which is then brushed over the top of each doughnut.

If you are cautious about consumption of oil you can equally well bake the risen doughnuts in a preheated oven at 180℃ for 15 - 20 minutes. Then you complete the doughnuts as before.

These Berliners are not only eaten at Mardi Gras, Shrove Tuesday or Fastnacht but throughout the carnival period and New Year! Please, let me know if you made them and how you liked them!

Enjoy!


Monday, 25 December 2017

King's Cake

Christmas is upon us and this recipe is coming very late indeed! Luckily this is a wonderful cake not only for Christmas but New Year as well and any other occasion in the year!

🎄🎄🎄🎄🎄

This recipe is from my Grandmother's handwritten collection and I love making it at least once a year. For this Christmas I baked several to share with my daughters and their families. Next year I hope they will do the baking, for a change!
Original Recipe in my Grandmothers'
Handwriting
                                                                                     
🎄🎄🎄🎄🎄

Let me translate:
King's Cake  (Königskuchen)

250 g butter (room temperature)
200 g sugar
4 eggs
500 g flour
4 tsp baking powder
250 g raisins
zest and juice of 1 lemon
2 Tbsp vanilla sugar
a pinch of salt
rum for soaking the raisins (enough to cover them)
🎄🎄🎄🎄🎄

This is how my grandma will note down the ingredients without explaining details. So I will do so instead. Raisins usually means a mix of currants, raisins and sultanas with the addition of chopped candied peel. Raisins also means the said mix has to be soaked overnight with enough rum (brandy as alternative, but it is not as tasty) to cover. Vanilla sugar is always made at home. Split a vanilla pod in half, place in a fairly large glass jar and fill up with sugar. ready for use in a couple of weeks. And never forget a pinch of salt! When asked why she doesn't add it to her list of ingredients she replied that that is a given, everybody knows to add salt! Now let us bake!

🎄🎄🎄🎄🎄

You will need a loaf tin approximately 30 x 10 x 10 cm, lined with baking paper. Preheat oven to 180℃. Drain raisins, reserving the liquid. Sift flour, baking powder and salt.

Cream butter, sugar and vanilla sugar until really fluffy. Now beat in the eggs one at a time until fully worked in. Start adding about a quarter of the flour mix, work in until absorbed. Add juice and zest of the lemon and 2 or 3 Tbsp of the reserved rum. How much to use is determined by the flours' rate of absorption. Add another quarter of flour and mix in thoroughly. Continue until the flour is used up. The dough should drop heavily from the spoon, so do not add to much of the rum (keep the excess for another recipe). Finally add the drained fruit and mix until evenly distributed. Place dough in prepared loaf tin and bake on centre shelf for about one hour. When a skewer inserted comes out clean the cake is ready. Allow to cool in the tin for 10 minutes, then turn out, remove paper, then place on cooling rack.

If you wish, the cake can be covered with glacé icing to make it more festive (and sweeter)!

🎄🎄🎄🎄🎄

My trusty baking spoon
My triple batch of dough


The finished  Königskuchen


Hopefully you will find time soon to make this delectable cake!

Then let me know how you rate it!

A Merry Christmas to everyone!

🎄🎄🎄🎄🎄🎄🎄🎄🎄🎄🎄🎄🎄🎄🎄🎄🎄🎄🎄🎄🎄🎄🎄🎄🎄🎄🎄🎄🎄🎄🎄🎄🎄🎄🎄

Tuesday, 19 December 2017

Cinnamon Stars A Century Ago

To bake cookies for Christmas is a centuries old tradition dating back to the Middle Ages! Today I want to share one of the old recipes with you, not from that long ago but over a hundred years old and handed down from my grandmother.

Despite technological advances and modern ingredients for modern recipes some good old fashioned  recipes cannot be improved upon. This is one of them!


Cutting of first batch
Ingredients:

75 g butter
75 g sugar
3 Tbsp honey
1 egg
zest of 1 lemon
8 g ground  cinnamon (I use 2 tsp)
250 g flour
3 tsp baking powder
50 g ground almonds, peanuts or walnut          (I used freshly roasted and ground peanuts)
125 ml apple wine, or less, depending on consistency
 ( apple juice will do if preferred)


Ready for baking
Method:

Cream butter and sugar until fluffy, add honey, egg and lemon zest and mix until smooth. Sift flour with baking powder and stir in the ground nuts of your choice. Add about half of the dry ingredients to your butter mixture and combine until absorbed. Add a little of the apple wine, stir in, then add more of the flour mix. The dough should be smooth and a little soft but not sticky. Wrap in clingfilm and chill for an hour or overnight.
Preheat oven to 180 C.
Roll out dough to pencil thickness, cut out stars and place on ungreased but floured baking sheets. Bake on middle shelf for 7 to 10 minutes or until light brown around the edges. Transfer to cooling racks. These cookies will not be crunchy but will remain soft.

An easy way to roll out the dough without it sticking to the rolling pin is to do the rolling between two layers of clingfilm 

To decorate the stars mix 250 g sifted icing sugar with a little fresh lemon juice to obtain a fairly thick icing. Use brush to coat each cookie and sprinkle with vermicelli or Hundreds & Thousands. Or decorate according to your own preference!


Ready to be enjoyed


The cinnamon stars will keep fresh for about two weeks in airtight containers separated by layers of greaseproof or waxed paper.

Let me know your opinion when you have tried this recipe. I would really appreciate it!

Saturday, 9 December 2017

S-Cookies for Christmas

S shaped cookies are traditionally a year round treat. But today I will give you a variation which tastes and smells of Christmas. The secret is the added spicemix which makes these cookies extra scrumptious! The taste is reminiscent of Spekulatius, a traditional picture cookie from Germany. But not many home bakers have the necessary moulds to make those. So, a piping bag with a star shaped tip of at least one centimetre  will give you an excellent result.                                                                                                                                                                                                                                                 
S shapes piped on a lined baking tray

As I was piping merrily along the idea came to me to try the other letters of the alphabet. That way I can pipe all the letters to spell someone's name, which should be fun for children (of all ages)!


Not so easy without practice, but fun!


I also piped circles, otherwise known as Kringel, another traditional shape.


Fresh out of the
oven


Filled disposable piping bag


Now let us bake! You will need several baking sheets lined with parchment or baking paper. Piping bag with star nozzle or a piping syringe with a suitable tip.


Ingredients:

200 g soft butter, 100 g sifted icing sugar, 1 medium egg,
1 tsp vanilla extract, 2 Tbsp milk, a pinch of salt, 3 tsp spice
mix (recipe below), 270 g all purpose flour   

Method:

Using a handmixer cream butter and icing sugar till smooth, then add egg, vanilla and milk and mix to combine. Sift flour with the salt and spice mix and add half of this to the butter mix and mix in at low speed. When combined add the remainder and knead by hand until smooth. The dough should be soft but not sticky.

Spice Mix:

2 tsp ground cinnamon                          1/4 tsp ground green cardamom
1/2 tsp ground nutmeg                           1/4 tsp ground coriander
1/2 tsp ground cloves                             1/4 tsp ground white pepper (I prefer black pepper)
1/2 tsp ground ginger

Except for cinnamon and ginger which I buy already ground, use only whole spices which you toast and grind yourself in a spice blender. The taste is far superior to already ground spices which lose their flavour rather quickly. Likewise, nutmeg should be bought whole and grated finely according to need.

Now preheat the oven to 175 C and start piping the cookies onto the prepared baking sheets. This recipe yields at least 40 large cookies. I was able to get double the number because I used a tip of 1 cm diameter. Bake on middle shelf for 15 minutes until edges turn light brown. Cool on wire racks.
If you do not have enough baking sheets to use up all the dough, use the same sheets again but make sure they have cooled down completely between batches.

If you decide to make some alphabet cookies you should draw parallel lines on your parchment paper about 5 or 6 cm apart, turn paper over so the lines are on the back and will not affect the cookies.

Look closely and you see the lines


I hope you enjoy making these and eating them too! In my house these cookies do not last long. I would love to hear from you, comments, questions or other observations.


Tuesday, 28 November 2017

Gingerbread Cookies - Pfefferkuchen

Christmas is around the corner once again and so I want to share with you some recipes which after some tweaking here and there have become my favourites. Todays' recipe is meant for cookie cutters, stars, hearts etc. But if you have a gingerbread man cutter, all the better because the cookies are ideal for decorating with coloured icing. Or coating with melted baking chocolate or couverture. Both methods are great in temperate zones but here in the tropics any icing will just melt. Nevertheless the cookies are delicious!


First batch


And now for the recipe:
500 g wheat flour                                                          2 Tbsp water
1 tsp. baking powder                                                     1 medium egg
1 Tbsp bicarbonate of soda                                           2 Tbsp ground cinnamon
100 g sugar                                                                    2 Tbsp ground ginger
200 g golden syrup or molasses                                    1/2 tsp ground cloves
1 tsp vanilla extract                                                       1/2 tsp ground green cardamoms
125 g soft butter                                                            1/4 tsp freshly ground nutmeg
1/2 tsp salt                                                                                     

Ready for the oven
Method:
Mix all dry ingredients in a large bowl, including the spices. Then add the soft butter, syrup or
molasses, vanilla extract, water and egg. Mix with the dough hooks on your hand mixer, use a stand mixer or do it the old-fashioned way by hand. When dough is smooth wrap in clingfilm and chill for about an hour. Then cut dough into about 4 portions for easy handling.

Lightly flour your work surface and start rolling out the dough to about 1/2 cm thickness or slightly thicker. Place shapes on lined baking trays and bake at 190 degrees Celsius (375 F) in preheated oven for 15 minutes.

Remove to cooling racks together with the baking paper and allow to cool. Initially the cookies will be quite soft but will get crisp by next day. Once they are completely cool, store them in airtight tin containers. I find that plastic containers are not as efficient in keeping cookies fresh.

On the cooling rack
If you wish to decorate your cookies, the next day will be best. This recipe yields about 90 cookies, depending on size and thickness.


I would love to hear from you if you decide to try these cookies!

Sunday, 23 July 2017

Let's Make It A Date!


In my last post I promised the recipe for my date paste or puree which is an excellent substitute for sugar in baked goods. It is likewise good on a slice of bread and butter instead of jam. Maybe it can be used to sandwich cookies together or use it as filling for donuts Once you taste it other options will surely come to mind!

This post will be a bit lengthy, so let me start with the main ingredient, namely dates. The second ingredient is water and nothing else. Other items required are a bowl or two, a saucepan, cooking spoon, paring knife, a nylon sieve ( metal gives the puree a not so nice taste and also affects the colour ), jam jars or preserving jars and a wide-mouth funnel.


Raw dates 
I buy my dates locally from the market and usually they are really dry and hard, so they can't really be properly enjoyed until they get some TLC treatment.

Dates soaking in warm water

Put the dates in a bowl and cover with very warm water, not hot! Allow to soak for 30 minutes to 1 hour, depending on how hard they were to start with.
All seeds removed


Use the paring knife to cut the dates open lengthwise to remove the seeds. If dates are still too hard allow them to soak some more.


Place deseeded dates in your saucepan and cover with water. Cover with lid and bring to boil. When boiling, reduce heat to low and remove lid. Allow water to evaporate until you have just 3 or 4 spoonfuls of liquid left which should be a rich brown colour and look rather syrupy. The dates should be very soft now. If not add extra boiling water and again allow liquid to reduce.

Remove from heat and drain off the syrup and set aside. Allow dates to cool a little, then place in  a food processor and process until smooth, adding a little of the reserved liquid to soften the paste. 


Processing the dates

Now is tasting time. If you are satisfied with the texture you can fill the paste into the sterilized jars and seal, using a funnel for convenience. But I find that the skins of the dates don't quite disintegrate, so I add another step to get it really smooth like a proper puree. Turn the lot into a sieve and use a wooden cooking spoon to press through.
Pressing paste through sieve
That way you get a super smooth puree! Fill your jars  just up to the neck and seal with the lid. The puree will keep like this in the fridge for 4 - 6 weeks. To keep for longer storage use a simple preserving method. Choose a pot with a well fitting lid, large enough to hold your jars with at least 3 cm head  space and wide enough so the jars will not touch each other. Place a folded dishtowel on the bottom of the pot, fill with water and bring to boil. Using tongs, place the jars in the pot and bring water back to boil. Water should cover the jars completely. Reduce heat to medium and boil for 10 minutes. Place folded dishcloths on a work surface and carefully add your jars. Let them cool completely before labelling and storing. 

Please, let me know your verdict after you make it. 


Saturday, 15 July 2017

Anya's Muffins

 Since my last post a lot of things have happened to me healthwise. I am not going into gory details, but just want to say that the removal of the gallbladder requires some re-assessment of one's dietary habits. So, now in addition to creating a heart friendly/ diabetic meals for hubby, I have to plan my own with a serious reduction in fats and an increase in fresh fruits and veggies.

In the last couple of months I have designed a few smoothies which I greatly enjoy and take every day as my breakfast. They must be good because my young granddaughters want a share whenever they see me sipping mine!

The recipes for them will come in a later post. Today I will give you a recipe which will indulge your sweet tooth but has no sugar (good for hubby), low in fat (good for me) but rich in taste which is good for everybody!

INGREDIENTS:

2 - 3 ripe bananas
2 eggs
2 Tbsp date paste (recipe will follow in next post)
4 Tbsp vegetable oil
10 - 12 Tbsp milk (keep 2 or 3 Tbsp milk back)
-------
1 cup plain flour
1 cup whole wheat flour
1/2 cup tiger nut flour (or any other nut flour)
2 tsp baking powder
1 tsp ground cinnamon
2 Tbsp unsweetened cocoa powder
1 tsp rum (optional)

METHOD:

Lightly grease a muffin tin for 12 pieces. Preheat oven to 180 C.
Mash bananas with a fork and place in a large bowl. Add remaining wet ingredients and mix well. Sift all dry ingredients and add to bowl. Mix by hand or an electric whisk until well combined. Dough should fall in a heavy ribbon from spoon when lifted, if too solid, mix in the remaining milk.

Use an ice cream scoop to portion dough  into muffin tin. Makes 12. Place in oven and bake for 15 to 20 minutes. An inserted toothpick should come out clean when muffins are done. Let stand in the tin for a couple of minutes then remove to a cooling rack.

Another option is to use the same ingredients to bake a cake instead of muffins. For this you use a loaf tin which has been greased and floured. Bake at same temperature for 40 - 45 minutes.

Bon appetit!


Thursday, 23 March 2017

More Baked Akara!

After making a baked version of akara with yeast I experimented using baking powder instead. For the first attempt I only substituted the yeast (see previous post) with 1 tsp baking powder. The mixture baked well and was tasty but a little dry. So I decided to reduce the amount of water and add egg instead. It worked!

Since I was expecting a few guests I decided to make a double portion to surprise them. Here is the recipe which will yield two dozen beancakes:

INGREDIENTS
3 cups bean flour
2 cups water maximum
2 eggs
1 1/2 tsp salt
2 1/2 tsp baking powder
1 large onion
1 large tatase or 2 scotch bonnet peppers
4 Tbsp olive oil or any other good quality vegetable oil

PREPARATION
Grease 2 muffin tins lightly and set aside.
Preheat oven to 180C or gas 4
Finely chop onion and peppers, removing seeds. Heat oil in a small pan and saute onion and pepper for a few minutes on medium heat until onions become translucent and the oil turns red from the pepper. Turn off heat and allow to cool a little.
Meanwhile mix all dry ingredients in a fairly large bowl then whisk in about half of the water. Next add the eggs whisking to incorporate thoroughly. Next whisk in the onion, pepper and oil. Gradually add more water until mixture has a good dropping consistency. You might not need all the water..
Using a scoop divide mix equally between the two muffin tins to obtain 24 muffins. Bake immediately for about 15 minutes.Test for doneness with a toothpick; toothpick should come out clean and dry. Remove from tins and cool muffins slightly on a wire rack before serving or cool completely and freeze, wrapping each in foil to prevent them drying out. To reheat, place in a steamer for 10 minutes. Enjoy!


Saturday, 24 December 2016

Yeast Or No Yeast? - That Is The Question!

When I was very young my grandmother and  my mum always had an argument at the beginning of December as to which type of Stollen we were going to have at Christmas! My grandma, being very traditional, always opted for the one baked with yeast. My mum, on the other hand, preferred the one made with baking powder for the simple reason that it was less time consuming.

But yeast was not easily available in the area where we lived, and dry or instant yeast had not yet been invented (or commercialized)! So my grandma would write a letter to her friend who had a farm, and ask her for the supply of some fresh yeast. Now the waiting would begin for the precious yeast to arrive. There was a specific date on which the baking was to be done to give the Stollen enough time to mature before Christmas Eve!

If the yeast arrived in time my grandmother would gleefully assemble all the ingredients and chase the rest of the family out of the kitchen! But if the deadline passed without any yeast in sight, grandma would sulk and sit in a warm corner, wanting nothing to do with a yeastless Stollen.

By Christmas Eve the differences were forgotten and everyone enjoyed whatever was on offer! I still have my mum's handwritten recipe, which I will include in this post. But today I have chosen the traditional yeast Stollen from my grandmother's recipe collection which, in my opinion, is for advanced bakers only!


Ingredients:
2 tsp dried yeast
100g sugar
500g  flour
2 eggs, a pinch of salt
1/8 -1/4 l warm milk, scant
250g butter
100g raisins
100g sultanas
50g chopped candied peel
75g ground almonds
200g extra flour for kneading in

                               (Shaped loaves)

Method:
Make a regular yeast dough using only half the milk, keeping the fruits and almonds back. Knead dough thoroughly and allow to rise. When risen, add the almonds and dried fruit and knead lightly. If necessary add more flour and milk until you have a fairly stiff consistency. Shape into 2 loaves and place on buttered and floured baking sheet to rise again. Picture above.

                                (Well risen and ready for the oven)

Bake in preheated oven for 1/2 hour at 200C, gas mark 5. Immediately after baking, brush with melted butter and dust heavily with icing sugar.

                               (All wrapped up and ready to be enjoyed!)

Thursday, 22 December 2016

Another Visit To Grandma's Christmas Kitchen

It is almost too late to do anymore  baking for Christmas, but this recipe is utterly worth it. This is a fairly thick chocolate Pfefferkuchen baked on a tray and finished with a sugar glaze. The spice mix is milder than given in the previous recipe, so you have variety!

 What you need:

750 g flour
125 g grated dark chocolate,
3 peppercorns, finely crushed
2.5 g ground cloves
2.5 g ground cardamom
7.5 g ground cinnamon
zest of 1 lemon
65 g ground almonds or hazelnuts
                   
                     ___________

340 g honey (or syrup)
200 - 250 g sugar
1/8 l water (125 ml)
65 g butter

                    ___________

2 eggs, beaten
8 g potash (1 1.2 tsp)
1 small glass of rum

                    ___________

How to make:

Sift flour into bowl and stir in all other dry ingredients. in a saucepan combine the honey, sugar, water and butter and bring to boil. Remove from heat and allow to cool for 5 minutes. Pour slowly into the flour mix, stirring vigorously. Or use a mixer with dough hooks, which our grandmothers did not possess! Make sure the dough is smooth and well blended. Allow to cool completely.

In the meantime soak the potash in about 3 tbsp of warm water. When dough is cool, strain the soaked potash through a fine sieve and sprinkle all over the dough, then add the beaten eggs and the rum. Knead dough to incorporate the new additions. The dough will be fairly soft at this stage, so placing it covered in the fridge for a few hours will help it to mature and make it easy to roll out.

Lightly butter your baking tray and dust with flour. Place dough on it and using a rolling pin roll out the dough to about finger thickness. Bake in a preheated oven at 180 - 200 degrees C. gas 4 or 5, for 30 minutes. Immediately after baking cut into pieces, squares or rectangles, as you wish and brush with a hot sugar glaze which is made in the following way: Boil 140 g sugar with 1/8 l of water until a drop forms a bead when placed on a plate. Remove from heat and brush on the glaze. Finally place the pieces on cooling racks. The glaze will turn white when dry. If you wish you can add coloured sugar sprinkles before the glaze dries.I was too impatient to take pictures, so the glaze you see is still fresh and hot!

Thursday, 15 December 2016

Spicy!

After the last article I was asked what Lebkuchen spice is or rather what it is composed of. The professional bakers all have their own spice mix which is a well kept secret. Apart from that there are also regional differences, so the choice is not easy for the home baker. Ready-made spice mixes are now available but not in every part of the world. So I did some research and came up with my own version.

In order to get the best out of spices one should preferably buy whole spices instead of ground because they keep their flavour and aroma for a much longer time. Some spices like cinnamon and ginger are acceptable ground because generally they are used more frequently.

Another important factor is the ratio of each spice in relation to the others. Some spices are so strong in flavour that only a little is used in order not to overpower the rest.

Let me show you the spices I used:
From top to bottom on the left side:
ground cinnamon
ground ginger
whole cardamoms (only seeds are  used)
whole cloves
From top to bottom centre:
whole nutmeg
whole allspice (pimento)
who;e star anise
fennel seeds
From top to bottom on the right:
mace
ground coriander (I ran out of seeds)
ground pepper

Quantities for whole spices should at least be double of what is needed when ground. Remember to calculate well. I shall give you the amounts needed when ground to a fine powder.
cinnamon               2 Tbsp
ginger                     1/2 tsp
cardamoms
(seeds only)            1/2 tsp
cloves                      2 tsp
nutmeg                    1/4 tsp
allspice                    1/2 tsp
star anise                  1/2 tsp
fennel                       1/2 tsp
mace (blades)           a generous pinch
coriander                 1/2 tsp
pepper                      1/4 tsp.

The first five spices listed are essential to the mix, but adding the others will really enhance the complexity of flavours. But if you do not fancy a particular spice you can omit it or substitute for one with similar taste, e.g. fennel seeds for aniseed. 

To make up your batch of Lebkuchen spice put all the whole spices in a dry frying pan, after calculating and measuring,
 and fry on medium heat for 2 to 3 minutes, stirring constantly. Take off the heat and allow to cool. When cool place in spice grinder or coffee grinder and grind to a fine powder. If the quantity is too small to be processed properly add the already ground spices like cinnamon and ginger to help with the processing. 

I hope you enjoy making this, so you can create your own personalized Lebkuchen or Pfefferkuchen!


Saturday, 10 December 2016

More From My Grandmother's Christmas Kitchen

The enticing aroma and bewitching taste of Pfefferkuchen and Lebkuchen at Christmastime make them an unforgettable experience no matter how many years pass. These baked treats are in a class of their own and have no relationship with gingerbread in my opinion.

Recipes go back to the Middle Ages down to the 12th century when the spice trade was flourishing. Guilds were formed and no one not belonging was allowed to bake any Pfefferkuchen! Luckily we do not have these restrictions anymore and we have the choice of hundreds of well tested recipes!

My recipe today is not that ancient but just over a hundred years old. It is also fairly easy to prepare, considering that we now have blenders and mixers and food processors, items our grandmothers had to substitute with elbow grease!

What you need:
2 baking sheets, buttered and dusted with flour
Cooling racks, 2
Hand mixer with whisks and kneading hooks
Cookie cutters

Ingredients for the dough:
250 g granulated sugar (or a little less if you don't want it so sweet)
3 eggs
2 tsp Lebkuchen spice
60 g candied orange peel, finely chopped
zest of a fresh lemon
375 g plain flour
4 tsp baking powder

Preparation:
Sift flour and baking powder together in a bowl and keep aside. In a fairly large bowl whisk sugar and eggs until light and fluffy. add all the spices and mix in at low speed. Change whisks to kneading hooks and gradually incorporate the flour. On slow speed so you would not spread flour dust everywhere! When all flour ha been added increase speed and continue kneading for about 5 minutes until well combined. At this stage the dough is very sticky and impossible to work with. So wrap it in clingfilm and keep in the fridge for a few hours. Overnight is even better.
Preheat oven to gas 4 (180 C), placing the shelf just above centre. Flour your work surface and rolling pin. Roll out dough to almost finger thickness (one of the many quaint measurements), a generous 1 centimetre is fine. Using cutters of your choice cut out as many cookies as you can, re-rolling any leftover dough. Place on prepared baking sheets and bake for 10 - 15 minutes. Mine took 12 minutes! At 10 minutes they were not quite done and at 15 minutes they had become too crisp.
I think every oven is different, so it is advisable to bake a trial piece first in order not to ruin the lot! When done place on cooling racks and then prepare the icing.

For the icing you will need:
200 g icing sugar
1 egg white large
a very few drops of lemon or almond essence

Preparation:
Sift icing sugar into a bowl. In another bowl lightly whisk the egg white then gradually add the icing sugar on low speed and your chosen flavouring. Whisk until smooth and thick. Immediately brush the icing over the cookies and allow to set and harden before storing in airtight tins.

This recipe yields about 40 cookies.


Latest Post

THE TASTIEST PINEAPPLE-GINGER JAM

There are many different types of commercial pineapple jams to be had, some good, some bad and others terrible. Most contain preservatives a...