Tuesday, 19 June 2018

THE TASTIEST PINEAPPLE-GINGER JAM

There are many different types of commercial pineapple jams to be had, some good, some bad and others terrible. Most contain preservatives and other unhealthy stuff which isn't good for your general well-being.

But making your own assures you highest quality and superb taste. A well made jam produced in your own kitchen can easily keep for up to a year without losing its appearance or taste.

Pineapple-Ginger jam with fresh
home-baked bread
I have made jams and marmalades for many years, always using fruit when easily available at the peak of their season when such fruit is less expensive. This will allow you to to experiment occasionally, combining different fruit together or adding some spices for a change from the regular, everyday jams.

For this recipe I decided to add ginger to pineapple. Pineapple jam on its own is a bit humdrum generally but I know that fresh ginger brings a spicy liveliness to most everything. And, believe me, I wasn't wrong.

To make this jam is quite easy and not too time consuming. The work should be divided into two sections. Prep everything the first day and do the actual boiling of the jam the next day. But if you have the time do the first part in the morning and later in the afternoon you make the jam.

This is not the traditional way of making jam but it gives a tastier jam by eliminating additional water.

So, let us start with the recipe and what is needed.

fresh cubed pineapple

Ingredients:

1.2 kg fresh pineapple, cubed
150 g fresh ginger pulp obtained from about 300 g fresh ginger root
700 g sugar
2 tsp citric acid, dissolved in 4 Tbsp water

grated fresh ginger

Equipment:

3 jam jars and a large pot for sterilizing
Food processor, bowls and grater
tongs for lifting jars
sterilized funnel, jug and ladle
stainless steel pot for jam making
sugar thermometer (or a couple of chilled saucers)

Method:

Prep:

Processed pineapple and ginger
Peel and cube the pineapple, 2 large ones should give the required amount. Make sure to remove any eyes and all of the core.
Peel and grate the ginger and then pass it through a sieve to obtain the pulp.
Place pineapple and ginger in the food processor, if necessary in two batches, and process until there are no more chunks.
Pour into a large bowl and add the sugar. Stir it in to dissolve, then cover and place in the refrigerator for a few hours or overnight.
This will help to produce more juice, so no additional water is required to make the jam.

Jam Making:

Remove fruit pulp from the fridge and add to your pot. Cover, put on the fire and bring to boil. When boiling, reduce heat to simmer for half an hour. DO NOT STIR!
In the meantime sterilize the jars and lids in a water bath. Also immerse ladle, funnel and jug in boiling water, then keep on a clean kitchen towel until needed.
When the half hour is up, remove the cover, add the citric acid, increase the heat and bring back to boil. Now you can stir. After about 5 - 10 minutes the fruit will come to a rolling boil which will remain when you stir. This indicates that gradually setting point is approaching. If you have a sugar thermometer stick it in the pot now. If not, wait another 10 minutes or so to test the set on a cold plate.
Take a small teaspoon full of the jam, place on the chilled plate and run a line through the middle. If the liquid runs together it requires more cooking, but if the line stays open the jam is ready for potting.
Using a thermometer is easier because once it indicates 105℃ setting point is reached.
To avoid spillage and waste use the ladle to fill the jug, place the funnel on top of a jam jar and pour, leaving at least 2 cm space. Wipe rims to make sure they are clean and seal immediately. 
You may want to further sterilize them in a water bath or you can turn them upside down for about 15-20 minutes to allow a vacuum to form. Using jars with pop button lids are a great advantage here. If no vacuum has formed the button will move and you will have to process the jars again or the jam will not keep.
But if successful your jam can easily be kept for up to a year, if it can last that long with all its yumminess!


Three jars of the best pineapple-ginger jam
I urge you to try it; you will not be disappointed!

Next time I shall give you a great recipe for the perfect bread to go with your jam!


Saturday, 9 June 2018

Vegetable Pepper Soup

Pepper soup is a Nigerian staple enjoyed in every part of the country. You can find it in every roadside restaurant called buka and there are even special pepper soup "joints" where one can find almost all varieties possible. This soup is basically a rich broth made with a variety of meats and fish.

You have fish pepper soup, chicken, beef, mutton or goat. Not only the meat alone is used but also liver, heart, tripe etc, together with a special spice blend which gives the soup its unique flavour.

There are some varieties where yam is added to make the soup more substantial. Often this is given to a woman who just had a baby, most likely because of the invigorating properties of the dish.

The reputation of pepper soup must have travelled far because some time ago I was expecting a visitor from Europe who had heard so much about our pepper soup that she wanted to try it herself. There was just one tiny problem! This lady was a vegetarian. I have eaten many different kinds of this soup and cooked them too. But I had not come across any pepper soup entirely composed of vegetables!

So I put on my thinking cap and started experimenting. After some trial and error I came up with a combination of vegetables and grains which turned out to be very delicious and proved to be a hit not only with my visitor but family as well!

Hot and delicious Pepper soup
This dish is ideal for a light supper served with bread and butter, or could be enjoyed at the end of a fast. If you are not a vegetarian or vegan some sliced sausage can be added to make the soup more substantial.


To prepare this delicious recipe follow the recipe below.


Vegetable Pepper Soup


Recipe by Anne Lawal
This soup is great for vegetarians. Vegans will omit the butter and carnivores can add some sliced sausages or shredded chicken to give variety. Best served with fresh, crusty bread.
Prep time: 20 minutes, without the soaking time
Cook time: 30 - 45 minutes for the sorghum, 25 minutes for the soup
Total time: 1 hour 30 minutes
Yield: 4 portions


Ingredients

  • 1 tin sweetcorn
  • 175 g sorghum, soaked overnight
  • 1 onion, chopped
  • 1 clove of garlic, finely chopped
  • 1 leek, sliced
  • 2 or 3 sticks of celery incl. leaves, chopped
  • 4 carrots, sliced or diced
  • 3 medium potatoes, diced
  • 2 fresh chilli peppers (scotch bonnet), chopped and seeds removed
  • 1 tsp dried cayenne pepper
  • 1 tin (2 Tbsp) tomato puree
  • 1 tsp ground cumin
  • a handful efinrin (scent leaf), chopped
  • 2 Tbsp vegetable oil
  • salt and black pepper to taste

Cooking directions

  1. Boil the soaked sorghum in fresh water until soft, half an hour to 45 minutes. Cool slightly and puree in a blender. Then pass through a sieve to get rid of any husks. Set aside.
  2. Drain and rinse sweetcorn. Heat the oil in a fairly large pot and saute the onion and garlic until translucent, then add all the prepared vegetables and saute for another five minutes. Add enough hot water to cover completely and bring to boil. Then add the tomato puree and all the spices, holding back a good tablespoonful of the efinrin. Reduce heat and simmer for about 20 minutes until vegetables are soft.
  3. Now add the sweetcorn and allow to heat through. Next remove about 4 ladles of the soup and blend the rest. When smooth return to the pot and add back the soup you kept aside. Now add the blended sorghum which will thicken the soup. If necessary add more water and then bring back to boil. Taste for seasoning and if liked add a knob of butter for extra flavour. Turn off the heat.
  4. When serving, sprinkle each bowl with the remaining efinrin.

                                                                   ________________


Sauteing the veggies

Delicious Vegetable Pepper Soup

If you try it, and you really should, let me know how it turned out and what you might change!


Saturday, 2 June 2018

Mango Cheese Cakes

Do you know anyone who doesn't like cheesecake? I don't! And there are so many variations that often it is very difficult to decide which one to make. There are those with crusts or without, baked or unbaked, with dried fruit or without, and others again with fresh fruit on top.

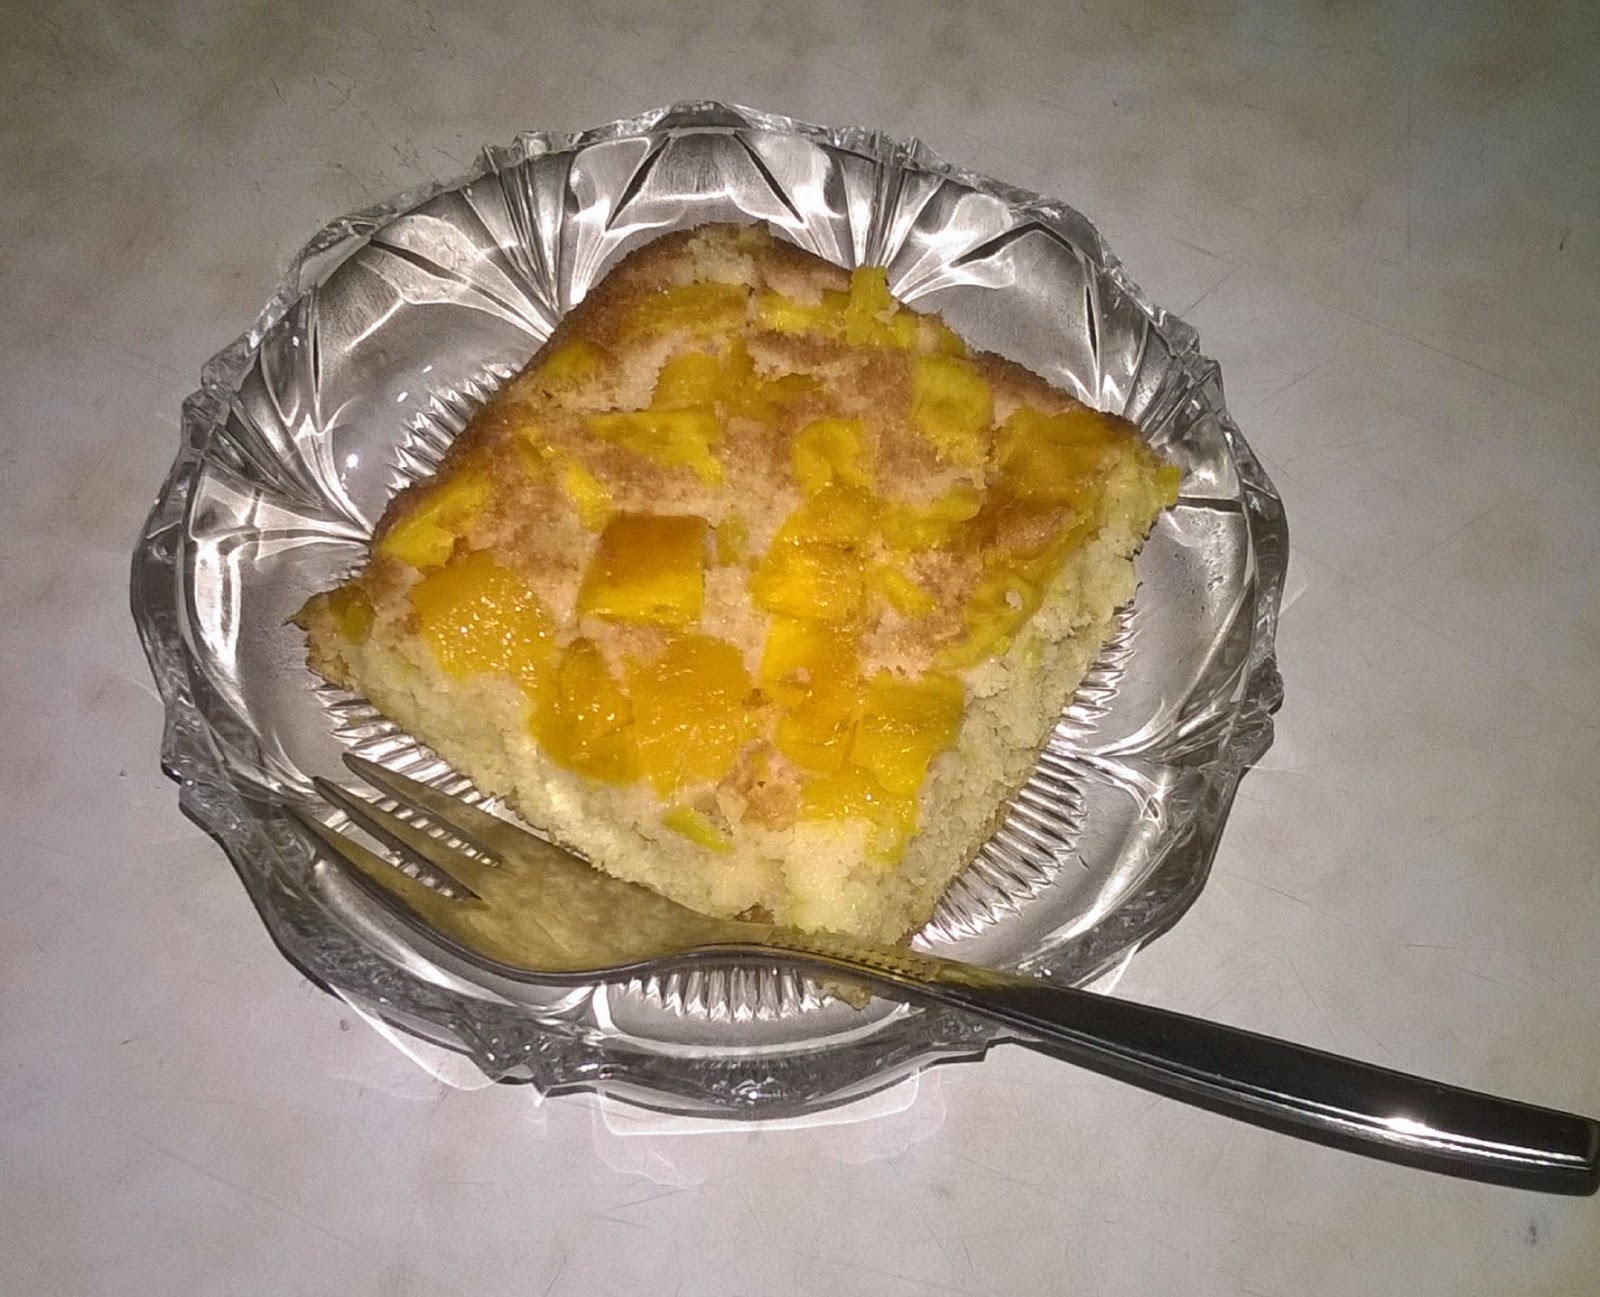
Little Mango Cheesecakes fresh from the oven

The recipe used was handed down to me by my grandmother and I have been baking it, as is, for many years, without variations because it is that good! But since there are so many different types nowadays I decided to create my own version. Now we are at the height of the mango season, so my idea was to make a fresh mango puree and incorporate it to the traditional mix.

To get the best cheesecake ever I recommend that you make your own cottage cheese first because it is preferable to shop bought cream cheese. My recipe for making your own can be found in my previous post. Also make your own mango puree because the canned variety is a poor substitute. Fresh is best; no preservatives, additives or other chemicals we don't want in our food! How to make your own puree is described in the post before. I tried to link but for some reason it did not work, so, please, bear with me!

All the baked cheesecakes I have tasted were made with flour like most other cakes and had a crust at the bottom. But my grandmother's recipe has no crust and no flour but wonderful texture throughout which is decidedly a plus! To achieve this texture the recipe calls for semolina instead, the finer the semolina the smoother the texture. I like to go the middle way so I have a cake with a little chew!

And now for the recipe:


Mango Cheesecakes


Recipe by Anne Lawal
This mixture makes 12 - 16 little cakes, depending on size of muffin tin and liners. The time variation depends on the moisture content of the cottage cheese. These cakes are lovely when fresh but improve enormously (in my opinion) if kept in the fridge overnight and eaten cold. Maybe with a dollop of whipped cream!

Prep time: 20 minutes
Cook time: 30 - 45 minutes
Total time: 50 minutes - 1 hour+
Yield: 12 - 16 little cakes


Ingredients:

  • 125 g butter
  • 200 g sugar
  • 300 g cottage cheese
  • 200 g mango puree
  • 3 eggs, separated
  • juice & zest of half lemon
  • 100 g semolina
  • 1 tsp baking powder

Cooking directions:

  1. Mix butter and sugar until fluffy, then add juice and zest of the lemon and the egg yolks. Pass the cottage cheese through a sieve in order to remove any lumps. Add to the mixture together with the mango puree and stir to incorporate. Add the semolina and the baking powder, stir to combine. Whisk the egg whites until stiff and place on top of the batter. Fold in the whites gently with a metal spoon until worked in, but do not stir. Using a spoon or ice cream scoop portion the mix into prepared muffin tins. Bake in a preheated oven on the middle shelf for 30 - 45 minutes until golden brown and an inserted toothpick comes out clean. When done cool on a wire rack.

Ready for the oven
Freshly baked


Sunday, 27 May 2018

Homemade Cottage Cheese

There are many names for cottage cheese and lots of different uses. I am sure each country has their own version, but one thing they all have in common is the method of preparation.

Basically it is the souring of milk which then separates into solids and liquid, forming the famous curds and whey mentioned in a certain nursery rhyme!

The finished product is called paneer in India, queso fresco in Spain/Portugal and much of Latin America; some parts of the US call it farmers cheese and others ricotta (but that is a misnomer). And not to forget, it is called wara by the Yoruba people in Nigeria!

Curds and whey

Cottage cheese is really the most basic of all cheeses and does not require any intricate knowledge of cheese-making! To the contrary, it is so easy to make that you will ask yourself why you have never done it before.

Regular cheeses like Parmesan, Cheddar or Emmentaler, to name a few, are produced using rennet, an enzyme produced in the stomachs of young calves to help them digest their mothers' milk. But our cottage cheese only requires a little acid to get the desired result.

I have tried various recipes successfully using different types of milk and different types of acid as well as the quick method and the slow one. Today I want to share the method which I prefer over all others!

Ingredients:                                     Equipment:

3 l milk, full cream                                                         a large pot, stainless steel preferably
1 Tbsp citric acid                                                            a colander and bowl of same size
1 tsp salt                                                                          a cheesecloth or a piece of muslin
                                                                                        a whisk

Method:

Start in the morning. Pour milk into pot and bring almost to the boil but not quite. Turn off the heat, add the acid and the salt and whisk briskly. The milk will separate right away, but this is where I prefer to go the slow way. Cover the pot with a clean dishtowel and keep it out of the way, so it can cool gradually and undisturbed.

 Cooling time depends on your weather or climate. Where I live the average day temperature is about 33℃, so it takes rather a long time to cool. Which in this case is an advantage because the longer it stays the more intense the flavour.

 In the evening you place the cheesecloth into the colander and put the colander on top of the bowl. Carefully empty the contents of the pot into the colander, tie up the corners of the cloth and hang up to drain.

 You can save the whey for cooking pasta or baking bread and preparing many other things, so consider well before discarding it. Let your freshly made cottage cheese drain overnight and in the morning it will be ready for use.

The cottage cheese after draining overnight

Now you can decide what to use your cottage cheese for. Sweet or savoury? I used this particular batch to make very yummy little mango cheese cakes for which I shall post the recipe next time.

This recipe using 3 litres of milk yielded a total of 475 g of cottage cheese, but it could be a little less or a little more depending on how much liquid has drained off.


Ready to be used

Mixed with some yoghurt and fresh fruit it is great for breakfast. Adding a little cream, salt, pepper, garlic and some fresh herbs the cottage cheese will make a very tasty spread for bread. So I urge you to experiment with adding flavours to make dips and spreads and even use it in sauces.


In my next post I will publish my recipe for mango cheese cakes as promised. Here is just a little preview:


Friday, 18 May 2018

Extra Fine Mango Curd

As long as the mango season lasts I shall post recipes containing them to show how wonderfully versatile they are. Today it will be mango curd.


Mango curd, great on toast, excellent with pancakes
and super in ice cream
Fresh from the tree and ready to eat


When I was first introduced to lemon curd I immediately became a fan. But over the years it became less readily available and eventually I stopped looking for it. Now, with mangoes everywhere, the idea just came to me to try and make a curd with them. So, I researched many recipes for lemon curd to give me an understanding of suitable quantities and types of ingredients.

The method of preparation is quite different from making jam or preserves but it is not difficult at all. It just requires some extra time but the result is worth it!

Let's go to the recipe:

Mango Curd

Equipment:

Weighing scales                            food processor
nylon/plastic sieve                        wooden spoon
stainless steel pan                         2 medium sized jam jars
a bowl for the puree
double boiler or heatproof bowl over a pan of same size

Ingredients:

4 fresh egg yolks                          175 g sugar
350 g mango puree                       2 Tbsp fresh lemon juice
90 g butter cut into cubes

Method:

First wash, peel and cut up the mangoes, between 4 and five, depending on size and weight. You want to start with a generous 400 grams. When the fruit has been prepared, chop it very finely in the food processor. When no more lumps remain pour into your sieve over a clean bowl and force the fruit pulp through the sieve with your wooden spoon. This ensures that all remaining fibres will be eliminated and that your finished mango curd will be super smooth and silky.

Mango puree, egg yolks, lemon juice and sugar in a bowl on top of a
pan with simmering water

Pour the puree into the heatproof bowl or the top of the double boiler, whisk in the egg yolks, lemon juice and sugar and place on top of the simmering water. The water must not touch the bottom of the bowl. Now keep stirring the mixture to prevent it from sticking to the bottom of the bowl because of the egg content. It will take approximately 10 minutes before the mixture thickens.

 When thick, gradually stir in the butter until completely melted. Then take off the heat and immediately pour into the sterilized hot jars and seal with the lids. When cold the lids should not 'give' when pressed down. That way the mango curd will keep for about a month in a cool, dark place. If a vacuum was not achieved keep the jars in the fridge, but not longer than a week before consumption.

Since there are no preservatives in this mango curd it is advisable not to keep it for more than a month.

Smooth and silky mango curd


Thursday, 10 May 2018

EASY MANGO CLAFOUTIS

Clafoutis is a simple baked dish traditionally made with cherries and is of French origin. Similar dishes can be found in various European cuisines using a different fruit in season. To give it a truly African flavour I experimented and came up with my own version using mangoes.


Mango clafoutis - an easy and light dessert
Since we are approaching the height of the mango season you can find a wide variety of different types in every market. For this recipe I recommend the larger varieties because they have a more intense flavour and are less fibrous. 

Wash and peel the mangoes and cut them into cubes as evenly as possible or, if you prefer, slices and arrange in a buttered baking tray, approximately 28 x 18 cm.


Mango cubes in the buttered pan

Next you will prepare the batter which must not be too thick or too thin. You must be able to pour it rather than spoon it.


Batter poured over the fruit - ready for the oven

So you can see that it does not require a great effort to have a delicious dessert ready in a fairly short time.

Fresh from the oven

And now to the recipe:

Mango Clafoutis

Ingredients

500 g fresh mango, cubed or sliced
2 eggs
125 g sugar
zest of 1/2 lemon
125 g flour
2 tsp baking powder
a pinch of salt
4 Tbsp milk, or less

Method

Whisk eggs together with the sugar and lemon zest. Sift flour together with baking powder and salt and add about half to the egg mixture. Then add 1 - 2 Tbsp of the milk, whisking until smooth. Whisk in the remaining flour and check for consistency. If too thick add another Tbsp of milk. The batter should flow from the whisk in a thick ribbon. If still too thick add the remaining spoonful of milk. I can't be more precise with the amount of milk because that depends on the flour. Some types need more than others, so you need to adjust.

Now pour the batter evenly over all the fruit and bake in a preheated oven at 180℃ for 1/2 hour. A skewer or toothpick inserted should come out clean. Keep in the pan and allow to cool slightly before cutting and serving. Warm or cold is equally delicious, especially if served with a dollop of whipped cream!

This quantity gives 6 -8 servings. But the amounts can easily be doubled.


Thursday, 3 May 2018

SUNSHINE IN A JAR - MANGO COMPOTE


The season is now in full swing and all the varieties of mangoes are available in the markets. For this delicious recipe you want to buy some larger mangoes, preferably those with a pink blush, because they are less fibrous. It is important to buy the fruit just ripe or slightly under. If the mangoes are fully ripe they have the tendency to lose their shape during storage.

To bottle the fruit for storage you will need jars which can be vacuum-sealed, and a large pot to accommodate the jars for sterilizing. A proper preserving pan is an advantage but not a necessity. You will also need a pair of rubber-coated tongs to lift the jars into and out of the pot.

If you are using a regular pot, line the bottom with a clean dishtowel and place an inverted plate on top, because the jars must not stand on the bottom of the pot directly.

Delicious mango compote

Fresh mango cut into bite sized pieces

Place fruit tightly into jar without squeezing
Next you need to prepare a sugar syrup to cover the fruit. The amount of sugar depends on the sweetness of the mangoes but should not be less than 300 g of sugar to a litre of water. If the sugar is too much the fruit will have a tendency to float which must be avoided.

For this recipe I used the amount given above, allowed it to boil for three minutes and then added the fresh juice of one lemon, which makes the syrup quite special.


Hot syrup covers the mangoes


Closed jar with rubber seal in place
These are the step by step pictures. Done correctly you will have jars and jars of utterly delicious mango compote when fresh mangoes are not available! And now for the recipe:

Ingredients:

750 g mango cubes, 300 g sugar, 1 l water, juice of one lemon

Equipment:

2 preserving jars [500 ml capacity each] with seals, preserving pan or pot large enough to hold the jars. For a regular pot a dishtowel and plate to fit inside the pot are needed. Tongs for lifting the jars and a smaller pot to make the syrup.

Method:

Sterilize jars with the oven method. 
Wash, peel and cut mangoes into bite sized pieces and fill jars up to the neck. Add the water and sugar to a small pot, bring to boil and simmer for 3 minutes. Turn off the heat and stir in the lemon juice. Pour over the fruit in the jars to cover completely. Clean the rims, place the seals on and close the lids.
If you are using a preserving pan follow the maker's instructions and keep the jars in for 20 minutes after sterilizing temperature has been reached.
If using a regular cooking pot place a dishtowel on the bottom and an inverted plate on top to prevent the jars from having direct contact with the pot bottom. Put in your jars and fill with hot, not boiling, water to just cover. Cover pot and bring to boil, then reduce heat to simmer for 20 minutes. Turn off the heat and allow jars to remain in the water for another 20 minutes. Then lift them out with rubber-coated tongs onto a dishtowel-covered tray and leave undisturbed for 24 hours. Then check if the seals are airtight. If not, repeat the sterilizing process, but only for 5 minutes. Otherwise place jar in the fridge and consume the fruit within a week. But if the seals are tight store the jars in a cool, dark place. Your compote can be kept for at least 6 months. 
The quantity given can easily be multiplied to take advantage of a plentiful supply of mangoes in season! The quantity given for the syrup should be enough for 4 jars.


Vacuum sealed and ready for storage


Friday, 27 April 2018

EASY CROCHET COASTERS

Coasters in different shapes and materials can be found in almost every home, on the breakfast table,  the coffee tray or the garden table. They are used to protect the furniture from the heat of your coffee as well as the condensation of your iced drinks. With constant use coasters should be changed or replaced often and for this reason it is good to have a variety to suit different settings and occasions.

And the best way to achieve this is by making your own. But don't just make them for your own home, also consider crafting a set as a gift for someone near and dear to you. Mother's day is close and the set of coasters I show you today would be quite a suitable gift and is quick and easy to make.


Coaster set 
For this set you will need 1 ball of yarn in each colour you wish to use, a crochet hook 3mm and 61 plastic rings about 5mm thick with an inner diameter of 1.5cm, 7 for each small coaster and 19 for the large one.


Plastic rings, slightly enlarged
Each ring is filled with 24 double crochet and closed with a slip stitch into a round.

If these rings are not obtainable you can change the way the coasters are made. In the video which follows you will be shown some smaller circles in different colours for a different look. Those smaller circles are worked around five chain stitches closed to a round. To obtain a similar sized coaster you will crochet 19 small circles. Each circle is made up of a 5 chain round, filled with 12 double crochet.


 As you can see, the starting tail is worked right into the round and therefore can be cut off on completion. Leave a tail when each circle is complete to attach each circle to the next from the wrong side of the work. When work is complete trim off any ends.

I hope you will enjoy this small tutorial and that it will inspire you to make many variations which you can treasure.

If there are any questions, likes or dislikes, please let me know. I will get back to you soonest.


1 large, 6 small

Friday, 20 April 2018

DELICIOUS MANGO PRESERVE

The last post gave you a recipe for a delectable mango jam but today I will show you a lovely variation which I call mango preserve. Searching high and low for the correct name I finally decided to call it a preserve.

There are marmalades and jams, jellies and confitures, fruit butters and cheeses, all prepared by different methods and for different purposes. But what they all have in common are fruit and sugar. I found that fruit butter comes closest to my own recipe but I simply find the name unappealing. And since it is not a commercial product I prefer to call this yummy spread mango preserve!


First jar of mango preserve, just sealed and still hot!

As I said in my last post, it is almost impossible to accurately determine how many mangoes will be needed to make up a given weight when prepped. So much depends on individual size and how juicy they are. If you buy your mangoes by weight get double the weight you need because skins and stones will be discarded. If you purchase the mangoes in the local markets you pay for a little heap of 3 or 5, depending on the seller. To obtain 1kg of prepared fruit you will need at least 15 mangoes, so I suggest to buy a few extra. You can always eat them fresh if they are too many!

Equipment needed is the same as in the previous post and if you are not sure about how to sterilize your jars you can read it there as well.

Before I come to the actual recipe there are a few preparations necessary. Wash the fruit , slice off the flesh as close to the stone as possible, then make vertical and horizontal cuts from the inside right down to but not through the skin. Turn the skin up and you'll get what is called a hedgehog. Now it is easy to cut off the mango cubes. Place on the scales and continue until you have 1kg. Then proceed to chop the fruit very finely so that only little pieces remain.


Finely chopped

Since mangoes are very fibrous it is important to cut them as small as possible.

Add mangoes and sugar to pot

The amount of sugar needed depends on the sweetness or tartness of the fruit. The normal ratio of sugar to fruit is 10% but not higher than 20% if the mangoes are very tart. 

                 
 To make your delicious mango preserve follow the recipe below:


Mango Preserve 
print recipe 
                                                   
           
A very tasty spread using less sugar than in regular jams
Ingredients
  • 1kg, prepped mangoes
  • 100 - 200g sugar depending on tartness 
Instructions
Place prepared fruit and sugar in your stainless steel pot and put on low heat. Stir a few times to distribute the sugar, then cover pot and allow to come to boil slowly. Continuing on low heat and keeping pot covered, boil for 30 minutes. Do NOT be tempted to open pot for stirring! Stirring will spoil the concoction at this stage by crystallizing the sugar. After half an hour you remove the lid and increase heat to allow the fruit to bubble. Now you will stir until the mixture thickens slightly. Test by placing a teaspoonful on a plate and drawing a line through it. If the line flows together continue cooking for another few minutes. But if it stays open take the pot off the heat and and bottle the preserve immediately and seal.
Details
Prep time: Cook time: Total time: Yield: 3 medium jars

Friday, 13 April 2018

THE BEST MANGO JAM

The mango season is finally here and it is time to preserve as much of the fruit as possible, so we can enjoy the taste not only now but during the rest of the year when mangoes are not available. Juices, jellies, preserves and jams can all be made and when prepared and stored correctly will not spoil for at least a year. To start I made a batch of mango jam which my family enjoy.


First batch of homemade mango jam

Maybe you think that jam-making is too difficult but it is not, I promise. The equipment needed can usually be found in any kitchen:
weighing scales
food processor or blender
a fairly large cooking pot, preferably stainless steel
a sharp knife and cutting board
cooking spoon (I prefer the wooden type)
a few saucers (for jam testing)
a funnel
a jug or ladle
a sugar thermometer is a bonus but it is NOT essential
jam jars
dishcloths, potholders or oven mitts
a deep roasting tray or similar for sterilizing the jars
a pair of tongs with a good grip


Jam jars can be bought or collected. I prefer to collect them, thereby saving quite a bit and since I only make jam for family and friends nobody minds what jar the jam comes in. Any jar from purchased items is safe to use as long as both jar and lid are free of any damage. And the lids should all have the pop-button which is very important for my way of bottling the jam.

If you have not made any jam or preserves before you might not be familiar with sterilizing the jars and other items like funnel, jug or ladle. So let me tell you the easiest method I know of. Wash jars and lids in hot soapy water until thoroughly clean. Then rinse in hot water to remove any trace of soap. Line a roasting tray with a clean dishcloth and place jars and lids as shown in the picture.

Ready to be sterilized, except the lid on the left which is damaged.
Heat your oven to 180℃, add water into the pan for about 1 cm and a few drops into each lid but not the jars. Allow 1/2 hour in the oven at the given temperature, then switch off. Keep the jars in the oven until the jam is done. It is best to sterilize the jars while the jam is cooking, so they will still be hot when the jam is ready to be bottled.

To sterilize jug, funnel and ladle wash as you did the jars, then place into a large pot, cover with cold water, bring to boil and continue boiling for three minutes. Cover pot and turn off the heat. This should be done before you start the jam, else you'll find that you don't have enough hands to do everything at the same time!

Now we can proceed to the jam making. Choose firm, slightly underripe mangoes without bruises or other signs of damage.

No damage, the specks are the dried tree juices from plucking the fruit
which will be washed off before processing.
It is impossible to say how many mangoes to buy for a given weight because the size of the stone varies as does the amount of juice. For this session I used 12 fairly large mangoes which yielded 900 g of prepared fruit. The ratio of sugar to fruit should be 2/3 i.e. 600 g. Water should be 900 ml. Process to a puree in  your food processor. If not available use a blender with  the addition of some of the measured water. Then place in your pot and proceed with the recipe below.
Fruit pulp with sugar added

Fruit pulp


Fresh lemon juice

Citric acid


RECIPE


Mango Jam


Tip


One does not have to purchase new jars for jam making. I firmly believe in recycling, so I collect
jars from commercial preserves as long as jars and lids are free from any damage. The lids should
all have a pop-up button and a kind of rubbery coating on the inside to ensure a firm seal.

Ingredients

1 kg fresh mangoes, chopped
700 g sugar
1 l water
2 Tbsp citric acid
Juice of one lemon

How To

Place all ingredients in a large stainless steel pot and bring to boil on high heat.
When boiling reduce heat to medium for about 20 minutes.
In the meantime place your chosen jam jars in the oven to sterilize.
After 20 minutes remove any scum which has formed on top of the jam. Increase heat to bring jam
to a rolling boil. If you have a sugar thermometer it should read 120℃. If no thermometer is
available, place a little jam on a cold plate and allow to cool.
Pushing it with your finger should make it wrinkly. That shows the jam is ready and needs to be
taken off the heat.
Remove jars from the oven , then fill with jam using a sterilized funnel and jug. Make sure the rims
of the jars are clean, then put on the lids tightly. When cool the jars should be sealed with the pop-
buttons down.
This way the jam can be stored in a cool, dark place for at least one year.


Friday, 6 April 2018

CYCA REVOLUTA - SAGO PALM


Cycas or sago palms are beautiful plants dating back to the age of dinosaurs. They resemble ferns when young and look almost like palm trees when more mature.

Cyca revoluta with a double trunk

But they are neither. They belong to the group of gymnosperms among which are the conifers, the cycads themselves, gingko trees and a few others. Native to Japan they found their way all over the world, especially where it is warm. Sago is produced from them which gives them the common name of sago palm.

On my walks in the neighbourhood I encounter quite a few of these lovely plants, obviously beloved by many gardeners.What caught my attention recently was the sudden appearance of a large cone in the centre of one plant, which happens only when the plant is mature and many years old. It also shows that this is a male plant, the cone containing the pollen. Female plants produce a feathery looking centre containing the ovaries. Unfortunately there is none among all the cycas in the area or they are too young to produce. Being gymnosperms none produce flowers but a glorious display  of a new crown of leaves in February/March. 

The pollen bearing cone of a male cyca
revoluta

The pollen bearing cones can grow from between 60 - 90 cm in height and can weigh up to 25 kg. the female plant produces egg-like seeds which should be harvested before they fall to the ground to prevent animals from eating them because they are poisonous. Of course the seeds can be used to propagate the plant, but that can take many months. An easier way would be to separate new plants developing on the trunk of the parent plant. 

Now I want to show you a short series of pictures taken in the second half of March when a few of the sago palms started producing their new crowns of leaves. Note the initial resemblance to ferns!


Day 2
Day 1


Day 4
Day 5


Day 7
So, within one week you see the enormous development of the leaves together with the gradual change in colour!

A few days later the crown opened out to complete the next revolution!


Fully formed leaves in gorgeous green


Latest Post

THE TASTIEST PINEAPPLE-GINGER JAM

There are many different types of commercial pineapple jams to be had, some good, some bad and others terrible. Most contain preservatives a...